

Recording at home: setting up your first studio

Home recording has become increasingly popular, allowing musicians and creators to produce high-quality music from the comfort of their own space. With technological advancements, setting up a home studio is more accessible than ever. This guide will walk you through the essentials of creating your own recording haven.
Having a home studio offers the convenience of recording at any time, the ability to hone your craft in a personal environment, and the potential for significant cost savings over time. It's an investment that can empower your musical journey or enhance your professional portfolio.
Essential Equipment for Your Home Studio
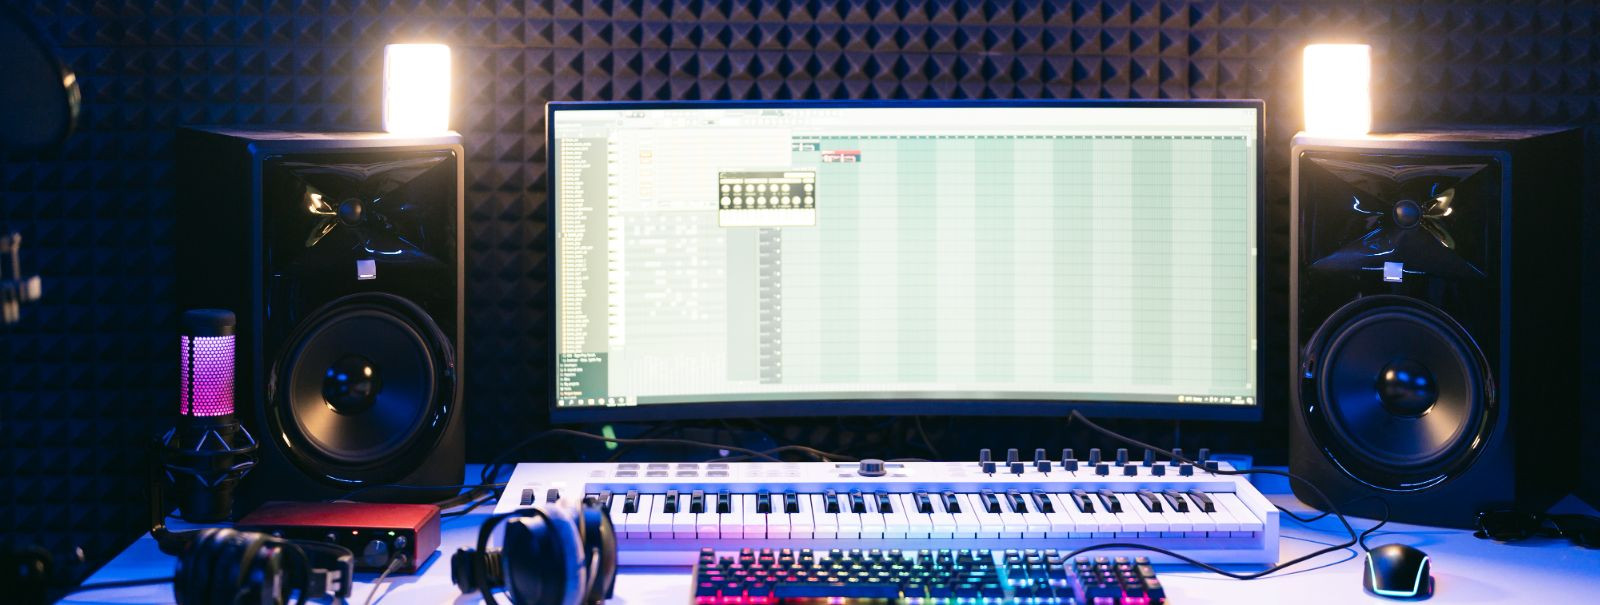
Your computer is the backbone of your home studio. A fast processor, ample RAM, and sufficient storage are crucial for running recording software smoothly. Whether you choose a desktop or laptop, ensure it meets the specifications required by your chosen Digital Audio Workstation (DAW).
An audio interface acts as the bridge between your instruments and your computer. It converts analog signals into digital data and vice versa. Look for an interface with the necessary inputs and outputs for your setup, as well as low-latency performance.
Different microphones capture sound in unique ways. A good starting point is a large-diaphragm condenser microphone for its versatility. However, your choice should be guided by the instruments or vocals you plan to record.
Accurate monitoring is essential for making informed decisions about your mix. Invest in a pair of studio monitors designed for a flat, neutral response. Additionally, a set of closed-back headphones is invaluable for detailed listening and monitoring during recording.
The DAW is where you'll spend most of your time recording, editing, and mixing. Options range from beginner-friendly to professional-grade. Consider the features you need and whether the software is compatible with your computer's operating system.
MIDI controllers can enhance your creative workflow, while external preamps can add character to your recordings. Other considerations include pop filters, stands, cables, and acoustic panels for your space.
Setting Up Your Recording Space
Select a room that is quiet and has minimal external noise interference. The size and shape of the room will affect its acoustics, so choose wisely.
Proper acoustic treatment can greatly improve the sound quality of your recordings. This can include bass traps, diffusers, and absorptive panels to manage reflections and standing waves.
Organize your space for comfort and efficiency. Your equipment should be easily reachable, and your chair and desk should promote good posture to facilitate long sessions without fatigue.
Getting Started with Recording
Connect your audio interface to your computer, set up your microphones, and ensure all drivers and software are properly installed. Test your signal path to confirm everything is functioning correctly.
With everything in place, it's time to record. Start with a simple project to familiarize yourself with the recording process and your equipment. Pay attention to gain staging, monitor levels, and input signals for the best results.
Keep your sessions organized, take regular breaks, and don't be afraid to experiment. Remember, the goal is to capture your best performance, so stay relaxed and focused.

Comments (0)